Getting started on Android Development from Command Line
As a quick reference, here’s a list of useful and most commonly used commands if you want to do Android development from command line (for example, without using eclipse or any other bloated IDE). You must have installed the Android SDK on your system, and make sure the tools and platform-tools folders from the android SDK are available in your PATH environment variable:
ANDROID_SDK="/home/user/android-sdk-linux_x86"
export PATH="${PATH}:${ANDROID_SDK}/tools:${ANDROID_SDK}/platform-tools"
If your SDK installation is not up to date, you can update it using the android update sdk command. To generate a list of system image targets use android list targets, this will produce output similar to this (stripped down for better readability):
id: 1 or "android-3"
     Name: Android 1.5
     API level: 3
id: 3 or "android-4"
     Name: Android 1.6
     API level: 4
id: 5 or "android-7"
     Name: Android 2.1-update1
     API level: 7
id: 7 or "android-8"
     Name: Android 2.2
     API level: 8
id: 10 or "android-9"
     Name: Android 2.3.1
     API level: 9
id: 12 or "android-10"
     Name: Android 2.3.3
     API level: 10
id: 14 or "android-11"
     Name: Android 3.0
     API level: 11
First thing you want to do is create an AVD (Android Virtual Device), this will create an emulator image where you can test your apps without using a real device, the android version used is specified with the -t command switch, and must be one of the targets available in the command we used avobe.
android create avd -n <name> -t <targetID> [-<option> <value>] ...
For example, to create an AVD running android 2.3.3, you would use the command android create avd -n Android233 -t 12.
To list all existing AVDs, you can use the command android list avd, this will produce output similar to this:
Available Android Virtual Devices:
    Name: Android233
  Target: Android 2.3.3 (API level 10)
    Skin: WVGA800
  Sdcard: 15M
---------
    Name: Android16
  Target: Android 1.6 (API level 4)
    Skin: WVGA800
To delete an AVD we no longer need, we can use the command android delete avd -n <name>.
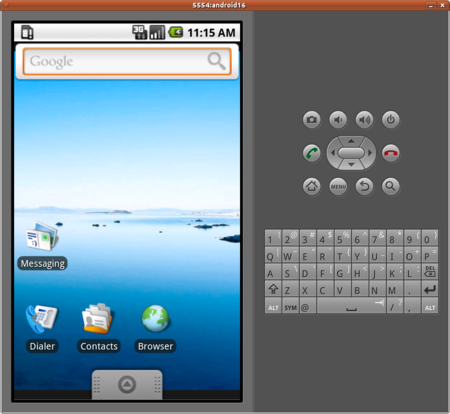
To launch the AVD, just use the command emulator -avd <name>:

Now it’s time to create our first project, we will use the command android create project with the following command line parameters:
android create project --target 1 --name MyApp --path ./MyProject --activity MyActivity --package com.example.myapp
Target specifies the minimum android version our project will be able to run, name is just the name of the application, path specifies the path in your hard drive where the project will be stored, activity specifies the name of the first Activity that will be run when we launch the program (an Activity is an application component that provides a screen with which users can interact in order to do something), and finally package specifies the namespace that will be used (it must be a unique package name across all packages installed on the Android system, following the same rules as for packages in Java).
Now it’s time to fire up your favorite text editor (vim FTW!!), and start coding… if you don’t know where to start, a good starting point is reading the Android Application Fundamentals from the Android Developers guide.
If you’re upgrading a project from an older version of the Android SDK or want to create a new project from existing code, we will use the command android update project as folows:
android update project --name MyApp --target 2 --path ./MyProject
The following commands are useful when you have finished coding your application and want to compile, run or debug it:
Building in debug mode:
cd ./MyProject && ant debug
Building in debug mode and install on already running emulator:
cd ./MyProject && ant install
Automatically launch app on the running emulator after building it:
adb shell 'am start -n com.example.myapp/.MyActivity'
And now, all together: build in debug mode, install and run on emulator:
cd ./MyProject && ant install && adb shell 'am start -n com.example.myapp/.MyActivity'
When you are happy with the results, you might want to build your app in release mode, for example to publish it on the android market:
cd ./MyProject && ant release
Note that output needs to be signed and zipaligned before it can be uploaded on the Android Market, you might want to read the Signing Your Applications chapter in the Development guide for instructions on how to generate your private key for signing your applications.
If you want to build in release mode, with the output signed and aligned, you can do it by modifying the ant.properties file in your project as follows:
echo "key.store=path/to/my.keystore" >> ./MyProject/ant.properties
echo "key.alias=mykeystore" >> ./MyProject/ant.properties
cd ./MyProject && ant release
Finally, to wrap up everything we will create a hello world app from command line:
android create project --package com.example.helloandroid --activity HelloAndroid --target 2 --path ./HelloAndroid

tee ./HelloAndroid/src/com/example/helloandroid/HelloAndroid.java <<-EOF
package com.example.helloandroid;

import android.app.Activity;
import android.os.Bundle;
import android.widget.TextView;

public class HelloAndroid extends Activity
{
    /** Called when the activity is first created. */
    @Override
    public void onCreate(Bundle savedInstanceState)
    {
        super.onCreate(savedInstanceState);
        TextView tv = new TextView(this);
        tv.setText("Hello, Android");
        setContentView(tv);
    }
}
EOF
android list avd
emulator -avd XXXXX &
cd ./MyProject
adb devices
ant install
adb shell 'am start -n com.example.helloandroid/.HelloAndroid'
Happy coding! :D